What Time Is It?

I love crochet
I love making
I love blogging
I love dreaming
I love sentimental
I love photographing
I am shy
I am quiet
I am talkative
I like animation movie
I like beautiful drawing
I care for my love one
I care about how others feel
I care about what i am looking for
I care about how others think of me

Sunday, June 26, 2016

White Rock Recipe

Hello people.
Not much to share about today, discover some nice cookies recipe while clearing my desk. Since I precious it that much, I think I better put it on internet. I can easily get it when I need and not need to worry that I lost it some where.

Well, it is just a simple cornflake cookies that I heart it so much. I ask my mom to get me the recipe from her good friend, Aunty 翠娟。

I managed to make the cookies without fail for several times. Somehow the recipe is an awesome discovery I got so far. I did post it out last time in my blog. There are some pictures of the cookies there.
Visit the post.

So, let's get started.

White Rock Recipe
Ingredient:
Egg white - 240gm
Caster sugar - 300gm
Cream of tar tar -1/4tsp
Corn flake - 200gm
Chocolate chips - 300gm

Bake at 150°c for 25minutes.

Is it a surprise to find the recipe just so simple. Well, I guess I did tell your earlier. I just want to make sure I got everything right when I bake again next time.

That's for today.
Thanks for reading.

Ps:  If you tried the recipe, send me some comment about it. I will glad to have someone share their thought with me.

Saturday, May 21, 2016

Hiberating but Crocheting

Blogging is an activity that required a lot of commitment. I had been hibernating for such a long period that I almost forget how to start.

Hello all my readers from every corner that can reach to internet. Assalammualaikum as well.

Yes, I was hibernating but my crochet journey still going well. I crocheted a lot lately and mostly amigurumi. I love creating cute amigurumi. The process of making it and the great successful feeling of completing one. Most of my amigurumi patterns can be found online where the amigurumi artists generously share it to all of us. My favourite amigurumi is the mini octopus from Mohu. If you love to crochet too, you should definitely check out Mohu blog. Lauren from Mohu can make cutest little animal amigurumi. She also draw adorable watercolour. Her blog is so simple and clean. It load super fast and there are clear button written free pattern. Well, check her out later.

 Lately, I put up a page on facebook to share my crochet amigurumi. Please do visit my page HanaBun_HouseOfCraft liked and follow me. Million thanks for you who liked my page. I appreciated it very much. You can view my latest amigurumis in my facebook page.

Can't really write much after all. See you all again in next post.

Love you all, my readers, so much.
Hugs and kisses...muaks!!
 

Sunday, January 24, 2016

My First DIY Air Dry Clay

Assalammualaikum and hello readers!

In my previous post I talked about me eyeing on Polymer Clay and going to make some cute stuff out of it, right? I even put some DIY air dry clay recipes that I googled on internet there. School holidays are finally here and I got my chance to get my hands dirty. Surprise me, my hands are not dirty at all. Hooray to Air Dry Clay!

I tried a few times at making my homemade air dry clay. I failed several time with my clay too dry and clamp up together. Then I tried again with different measurement, and it doesn't came out like what it should be like people showed in youtube. I just ignored it and tried on my very first clay item.

Failure 1

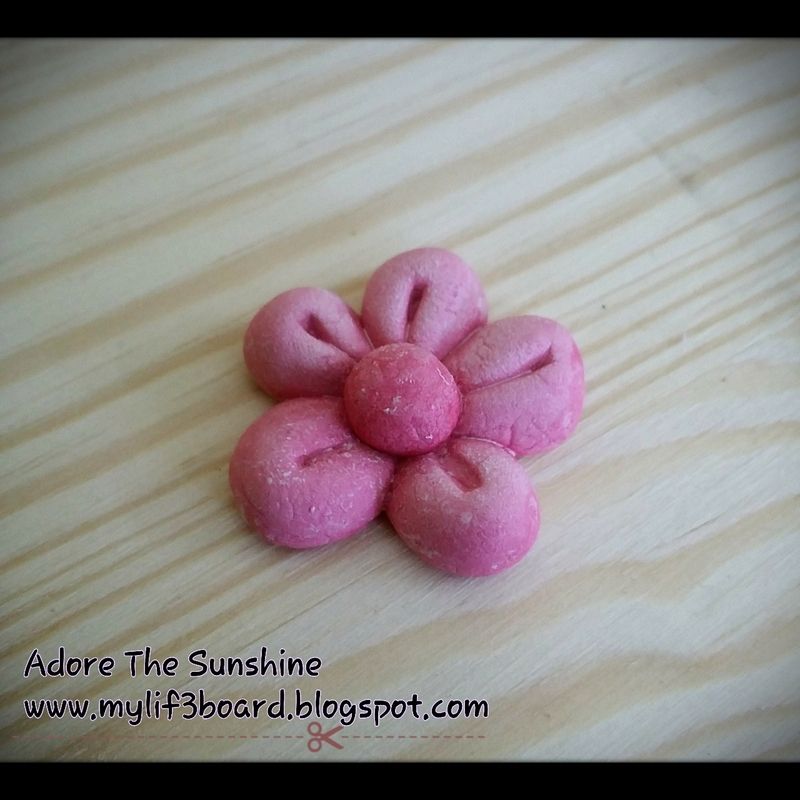
First object came out pretty well but the surface dry out so fast and it left a thin layer of starch on it. That is so not pretty. Let me show you here.


See that? Well, maybe my picture was edited and it did not show what I mean. The others clay items are so smooth looking and shinny too. What happen to you, my lovely homemade clay flower?? You don't like to be homemade issit??

Failure 2

OMG! Look at the picture. I can't speak a word when I saw that.


I was really impatient and I show my half dry star to my husband. He took it and had a pinch.
Then my Baby Qaseh said, ' Oh O'.

After this two incidents, I sat down and think about what happen to the clay. Recalling the Youtube video, their air dry clay are smooth and when you pull it, it look like pulling a soft sticky marshmallow. Maybe there are some mistakes I made when I made the clay. Why aren't my clay sticky? It is incorrect.

Looking back the ingredients, it is like what the people out there given. My main issue here is why my clay not sticky when I pulled it apart from the whole. So,maybe is the glue problem.

I decided to change the glue I use in making the second batch.

First batch I was using this PVA glue.


In the second batch, I changed to the normal transparent glue.

Finally, the second batch look much better. It was sticky when I pulled it apart. Immediatly, I started making something out of it.

I made a cute little star,with the pink eyes from the first batch clay.

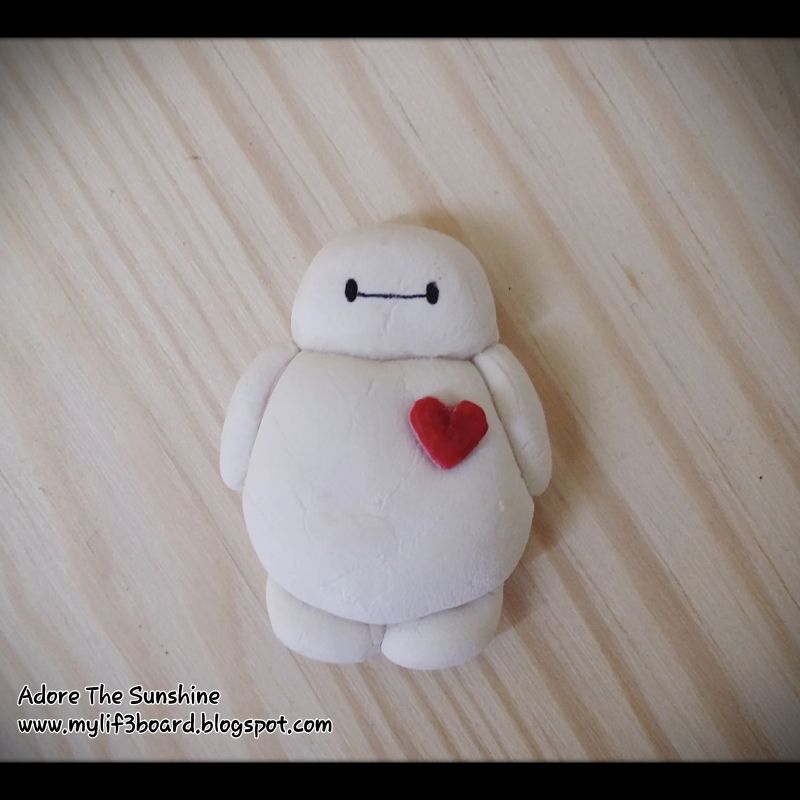
Then, a fluffy Baymax with pink heart from the first batch clay.


Hope is not too bad for the first timer.
Update you guys soon when I made another clay art.

Thanks for reading.
Bye.
Muah.

Saturday, January 23, 2016

New blogskin and I love it.

Hello and assalammualaikum to all my silent readers out there. (Do I have any reader I really didn't know that, I hope I got.)

This is my first post for this year and I get myself a new blogskin. I wish to change my blogskin since last year. You can read it here.Yet, until now only I get a new look for my blog.

What I love from my new blog look,
1. Is not that pinky anymore!! I had been pink for 2 and a half year already. No more pink for me. Although pink is not that bad actually. You can check out my previous pinkalicious blog from the link above. There is a screenshot of my old blog. This time I edit my blog without screenshot any picture.

2. My new blogskin load a lot faster than last time. This is a good news for all reader who stop by my blog. Waiting a blog to load is every annoying.

3. I really do love the simplicity of the blog design and layout. The font is comfortable to read, the colour is light and soft. And now I only realise, it did got a little bit of pinkish. Hahaha.. Well, that is okay enough for me.

4. The blogskin got it own bubbles other than the bubbles from my cursor. It blast out from time to time like a surprise bubbles. That's kinda interesting for me.

Last year just managed to update 5 posts. A big no no for a blogger. Am I consider quitting? Hope not so. Maybe this new skin will motivates me to keep blogging.

Well, I guess is not too late for me to say Happy New Year 2016!!!

Friday, June 26, 2015

DSV Tahun2 : Cetakan - menghasilkan pembalut hadiah dengan teknik cetakan

Assalammualaikum dan selamat sejahtera kepada semua pembaca senyap yang mengunjungi laman ini. Selasa adalah hari yang mempunyai waktu seni dalam jadual waktu saya, maka hasil murid-murid kali ini telah mencapai objektif mendorong saya untuk ambil gambar dan kongsi dengan semua.

Tajuk yang saya dedahkan kepada murid-murid saya pada kali ini ialah: Hasilkan satu pembalut hadiah dengan menggunakan teknik cetakan.

Kalau mengikut RPT, bahan untuk cetakan termasuklah bongkah kayu, tali parcel dan gam uhu. Bagi Hana, budak tahun 2 yang umurnya 8 tahun, mana nak cari bongkah kayu. Kalau disuruh beli, bukan tentu dapat cari bongkah kayu di mana-mana kedai. Maka, Hana cuba menjadi lebih kreatif dan inovasi dimana bongkah kayu diganti dengan kotak air minuman. Tali parcel digantikan dengan benang kait yang senang didapati dari kedai benang ataupun kedai kraftangan. Uhu tidak diperlukan sama sekali sebab benang kait boleh diikat dengan ketat.

Mari kita mulakan PdP kita.

Bahan yang diperlukan: Kotak air minuman, benang kait, cat air, berus cat, dan kertas lukisan.


Langkah:
     1. Bersihkan kotak air minuman terlebih dahulu sebelum digunakan.
     2. Lilitkan tali benang pada kotak air minuman.
     3. Sediakan cat air dan kertas lukisan.
     4. Gunakan berus cat, warnakan hanya satu permukaan benang yang dililit pada kotak aminuman.
         (tiga permukaan untuk pegang)

     5. Cetakan corak lilitan benang yang telah diwarnakan dengan cat air ke atas kertas lukisan.
     6. Ulangi langkah 4 dan 5 untuk menghasilkan corak cetakan yang berulang.
     7. Galakkan murid mencetak corak tersebut dengan terancang.
     8. Murid boleh menggunakan warna yang berlain untuk menghasilkan karya yang lebih menarik.
Di bawah adalah hasil kerja yang dihasilkan oleh murid saya yang kreatif dan cantik.


Gambar 'close up' hasil kerja anak-anak murid saya.


Dan hasil kerja saya sebagai contoh kepada mereka.


Sekian sahaja, harap petikan saya ini dapat membantu anda dalam merancang RPH yang akan datang.

Terima kasih atas kunjungan anda.
Cute Custom Designs

Followers


Adore The Sunshine Template by Ipietoon Cute Blog Design and Bukit Gambang