Assalammualaikum and hello readers!
In my previous post I talked about me eyeing on Polymer Clay and going to make some cute stuff out of it, right? I even put some DIY air dry clay recipes that I googled on internet there. School holidays are finally here and I got my chance to get my hands dirty. Surprise me, my hands are not dirty at all. Hooray to Air Dry Clay!
I tried a few times at making my homemade air dry clay. I failed several time with my clay too dry and clamp up together. Then I tried again with different measurement, and it doesn't came out like what it should be like people showed in youtube. I just ignored it and tried on my very first clay item.
Failure 1
First object came out pretty well but the surface dry out so fast and it left a thin layer of starch on it. That is so not pretty. Let me show you here.
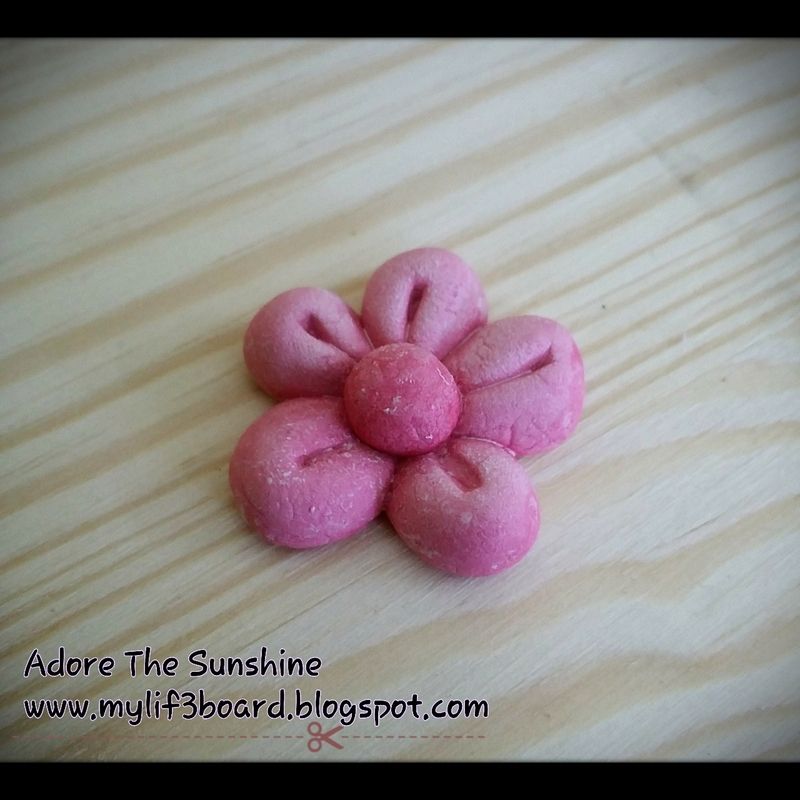
See that? Well, maybe my picture was edited and it did not show what I mean. The others clay items are so smooth looking and shinny too. What happen to you, my lovely homemade clay flower?? You don't like to be homemade issit??
Failure 2
OMG! Look at the picture. I can't speak a word when I saw that.
I was really impatient and I show my half dry star to my husband. He took it and had a pinch.
Then my Baby Qaseh said, ' Oh O'.
After this two incidents, I sat down and think about what happen to the clay. Recalling the Youtube video, their air dry clay are smooth and when you pull it, it look like pulling a soft sticky marshmallow. Maybe there are some mistakes I made when I made the clay. Why aren't my clay sticky? It is incorrect.
Looking back the ingredients, it is like what the people out there given. My main issue here is why my clay not sticky when I pulled it apart from the whole. So,maybe is the glue problem.
I decided to change the glue I use in making the second batch.
First batch I was using this PVA glue.
In the second batch, I changed to the normal transparent glue.
Finally, the second batch look much better. It was sticky when I pulled it apart. Immediatly, I started making something out of it.
I made a cute little star,with the pink eyes from the first batch clay.
Then, a fluffy Baymax with pink heart from the first batch clay.
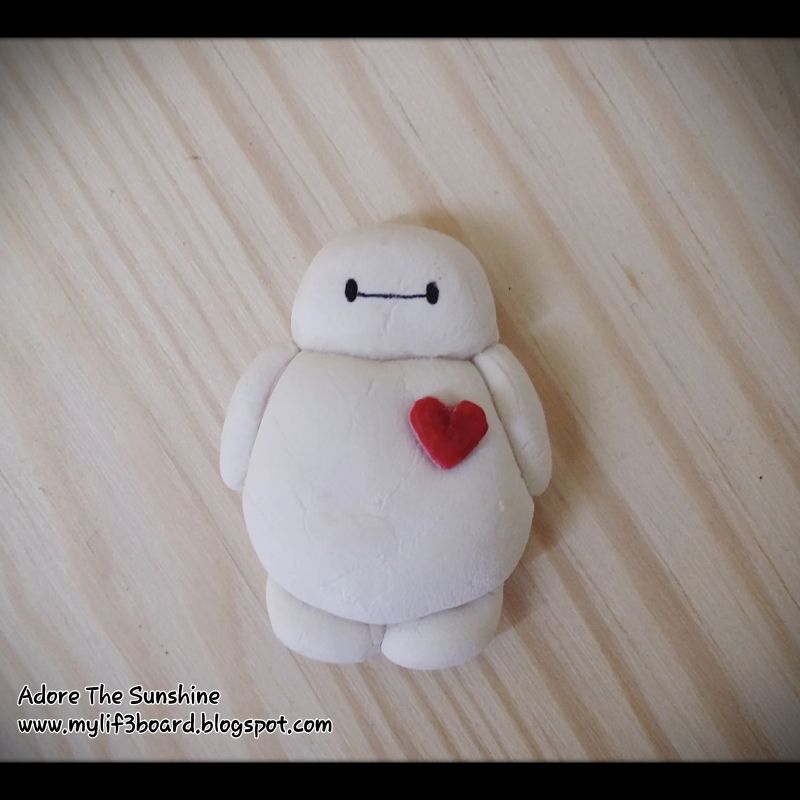
Hope is not too bad for the first timer.
Update you guys soon when I made another clay art.
Thanks for reading.
Bye.
Muah.
What Time Is It?
I love crochet
I love making
I love blogging
I love dreaming
I love sentimental
I love photographing
I am shy
I am quiet
I am talkative
I like animation movie
I like beautiful drawing
I care for my love one
I care about how others feel
I care about what i am looking for
I care about how others think of me
Showing posts with label Polymer Clay. Show all posts
Sunday, January 24, 2016
Monday, May 25, 2015
Hana's Eyes On Polymer Clay
Assalammualaikum and hello to all my readers out there, how are you? Ring any bell when saw my post? I know I been missing for a very long period. Last post of mine is at January. Hello,hello, now is May, Hana.
Well, back to the topic, Polymer Clay! Have you ever heard about polymer clay? Or you are one of the clay craftsman?? Please do share with me if you make polymer crafts, I love looking at people's polymer charms,. They are so so pretty and cute. I think those whose love miniature also collect mini polymer clay item for their mini house.
![]() |
| source : Etsy.com |
![]() |
| source: Pinterest |
![]() |
| source: Tumblr |
![]() |
| source: Etsy.com |
![]() |
| source: Blomming.com |
See, they are so nice, pretty,cute and adorable! Every time I look at the pictures, I wish I can make some of them too. Well, I consider myself a crafter too as I make amigurumi and crochet some keychains and bags. You can read them all here - Crochet Fun.
Everything is just under your fingertips if I wanna do it. See, there are so many pictures tutorial of making those cute little pretty things. Let's me show you.
![]() |
| source: fabdiy.com |
![]() |
| source : Duitang.com |
Well, there are material ready out there too, ready to be own. Of course we will need to have tools and oven ready too, as polymer clay required baking process to be firm and hard. Another option beside using baked required polymer clay, we can try on air dry clay. As what it state, air dry, no bake require.
Google about air dry clay, suprise me, I found a recipe of homemade air dry clay!! Yeah! Why not try to use some homemade air dry clay before heading for professional air dry clay or polymer clay.
Interested in the air dry clay recipe? Let's me share what I found.
Homemade Air Dry Clay (Hana improvice version)
Ingredients:
2 cups of Cornstarch
1 cup white school glue
Baby oil few drops
food colouring (optional)
Steps:
- First, put the cornstarch in the bowl.
- Next, add some baby oil into the bowl.
- Then, add the glue slowly into the bowl and the start mixing it all together.
- If you want to make clay in several colours, separate your clay into parts. Add in food colouring to colour each part separately.
- Finall, knead the dough repeatly until it is soft and sticky.
Shared by Mudworks, by MaryAnn F. Kohl, who calls it Play Clay.
Ingredients:
1 cup baking soda
1/2 cup cornstarch
2/3 cup water
Steps:
Ingredients:
1 cup baking soda
1/2 cup cornstarch
2/3 cup water
Steps:
- First, mix the baking soda andcornstarch in a saucepan.
- Next, add water and stir until smooth.
- Over medium heat, boil and stir until it is the consistency of mashed potatoes.
- Put on a board to cool some, knead it until it is ready.
- Store leftover clay in an airtight container and it will keep for several weeks.
- Modelled figures will air dry very quickly and are pure white in colour.
There, two different recipes for air dry clay. You can also google for more other air dry clay recipe. So far, I will try on this two and find out which outcome is better. So, do you want to join me and our hands dirty?? Left me a link of your post in my comment box if you do join me.
Next post, I will be sharing with you my creation and a great online store in Malaysia to buy Polymer Clay! Stay in touch!!
Polymer clay away......
XOXO
Hana
Labels:
Air Dry Clay,
DIY,
Handmade,
Polymer Clay
Subscribe to:
Posts (Atom)


